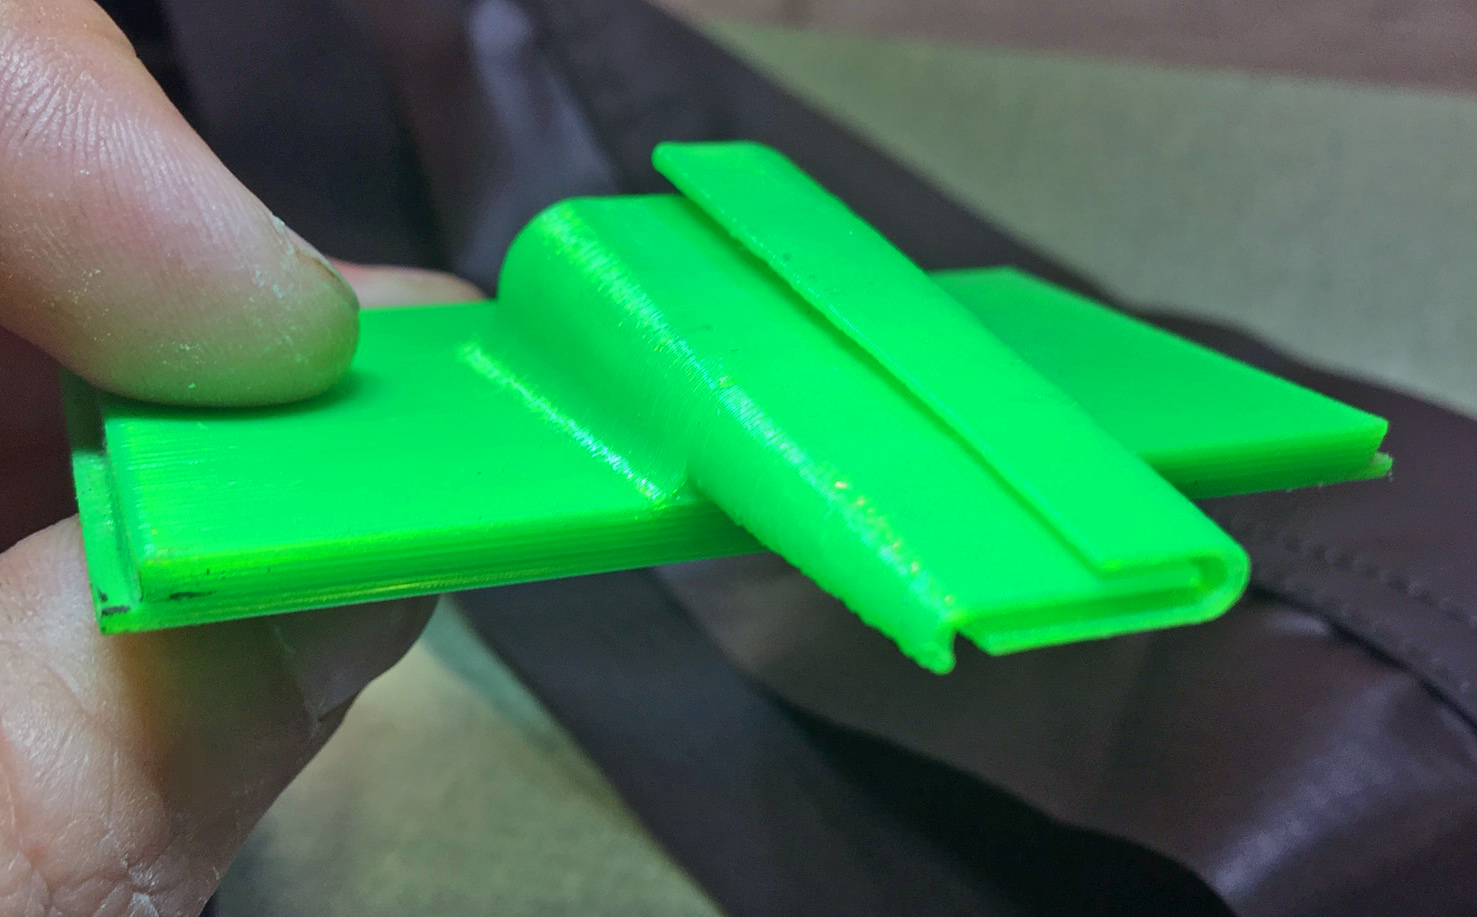
Lightweight fabric doesn't work in your seam folder? Try Harder!
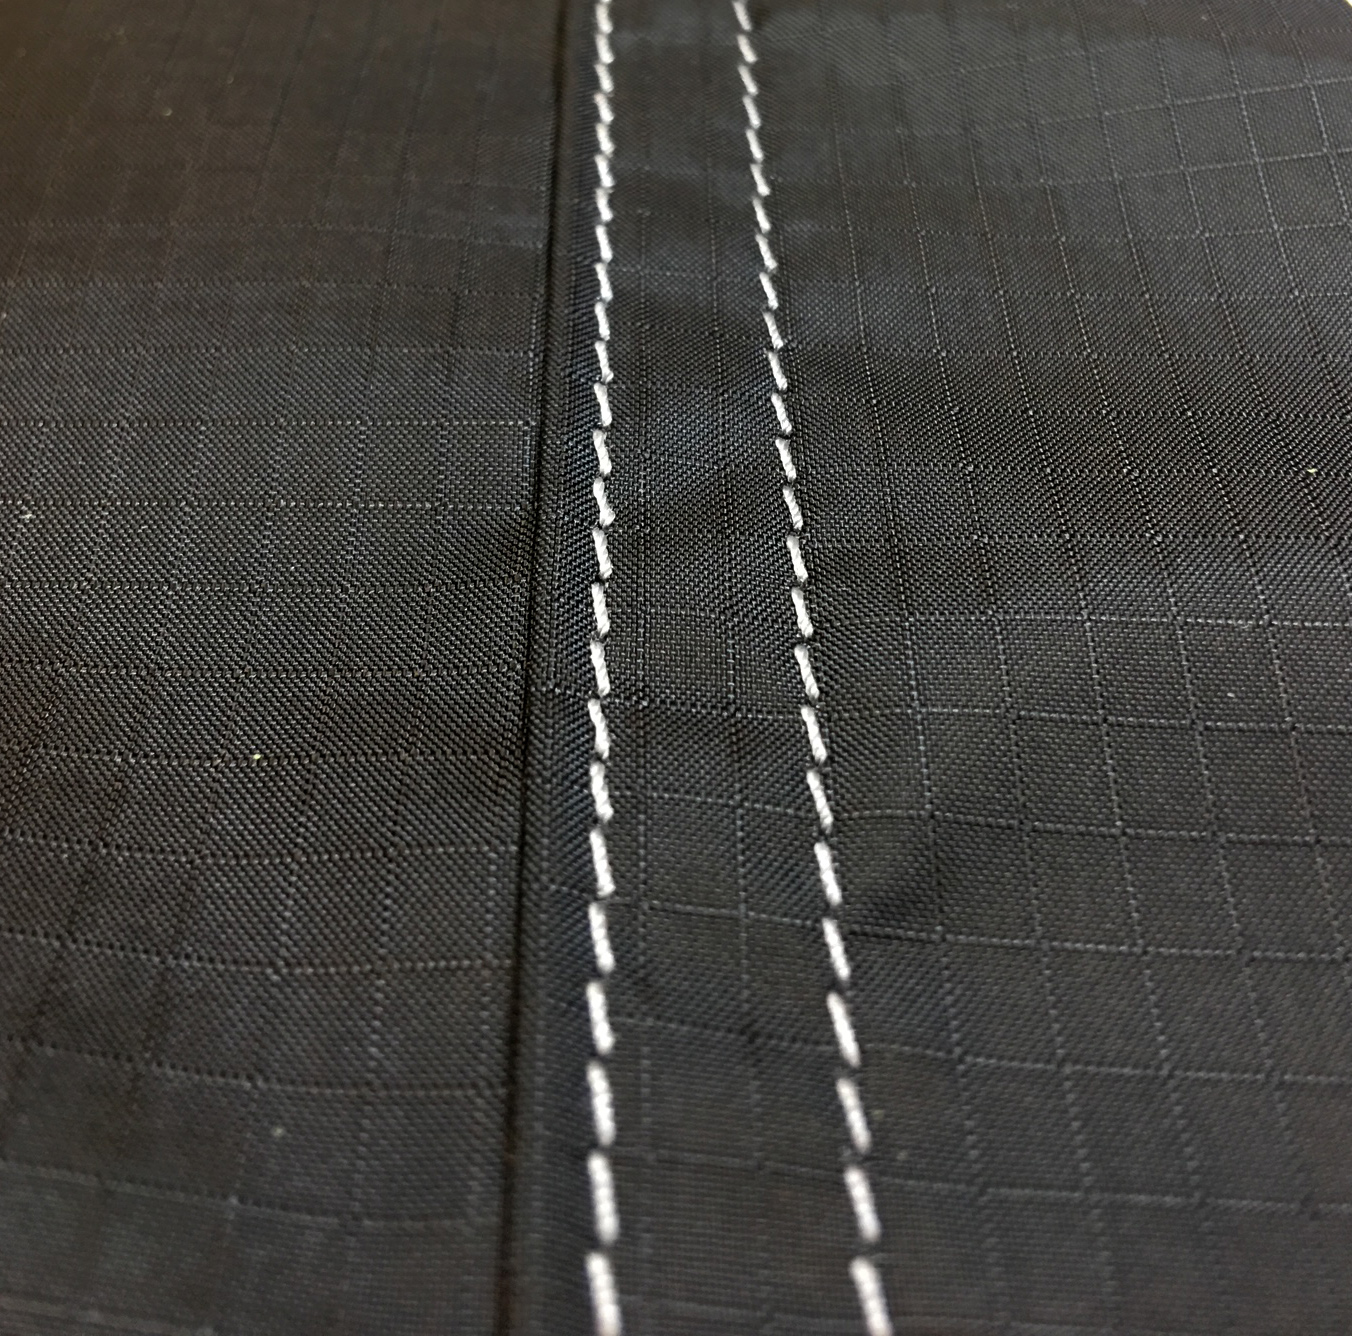
Yes, 1.3 oz. silicone-coated ripstop nylon is tougher to work with overall, but once it's properly in a seam folder (or folded manually) and sewn down, there's very little difference between sewing the lightweight stuff and 1.9oz fabric other than the fact that it's more slippery and half as thin. I find that it is way easier to get silicone fabric into a folder than it is to get Nomex or even 1.9oz fabric with a faintly tacky urethane coating. The silicone fabric slides easily over the other half of the fabric in the fold and thus can be positioned more easily. HOWEVER, it's definitely more difficult to LOCK it into position once you get it right, because it is so prone to sliding around over itself. Use as many fingers as necessary as well as your forearms to make sure the two pieces don't move out of position before you can trap the fold under the presser foot and lock it with the needles.
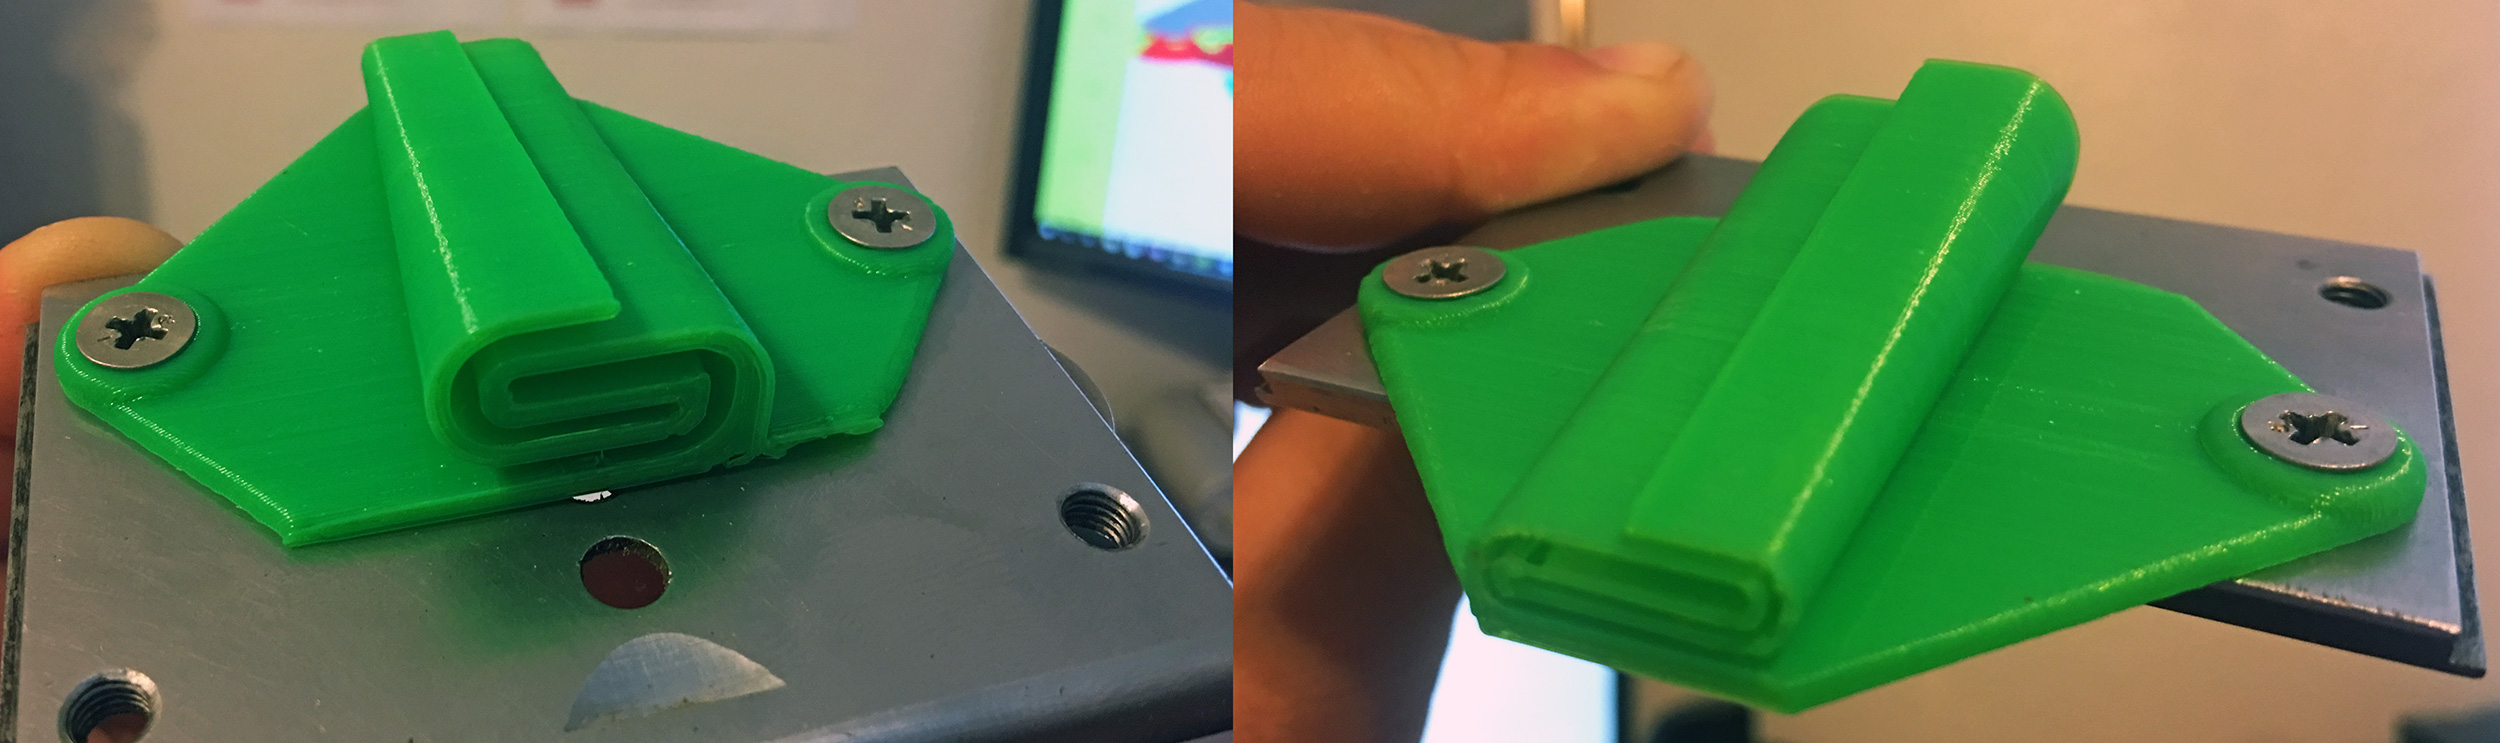
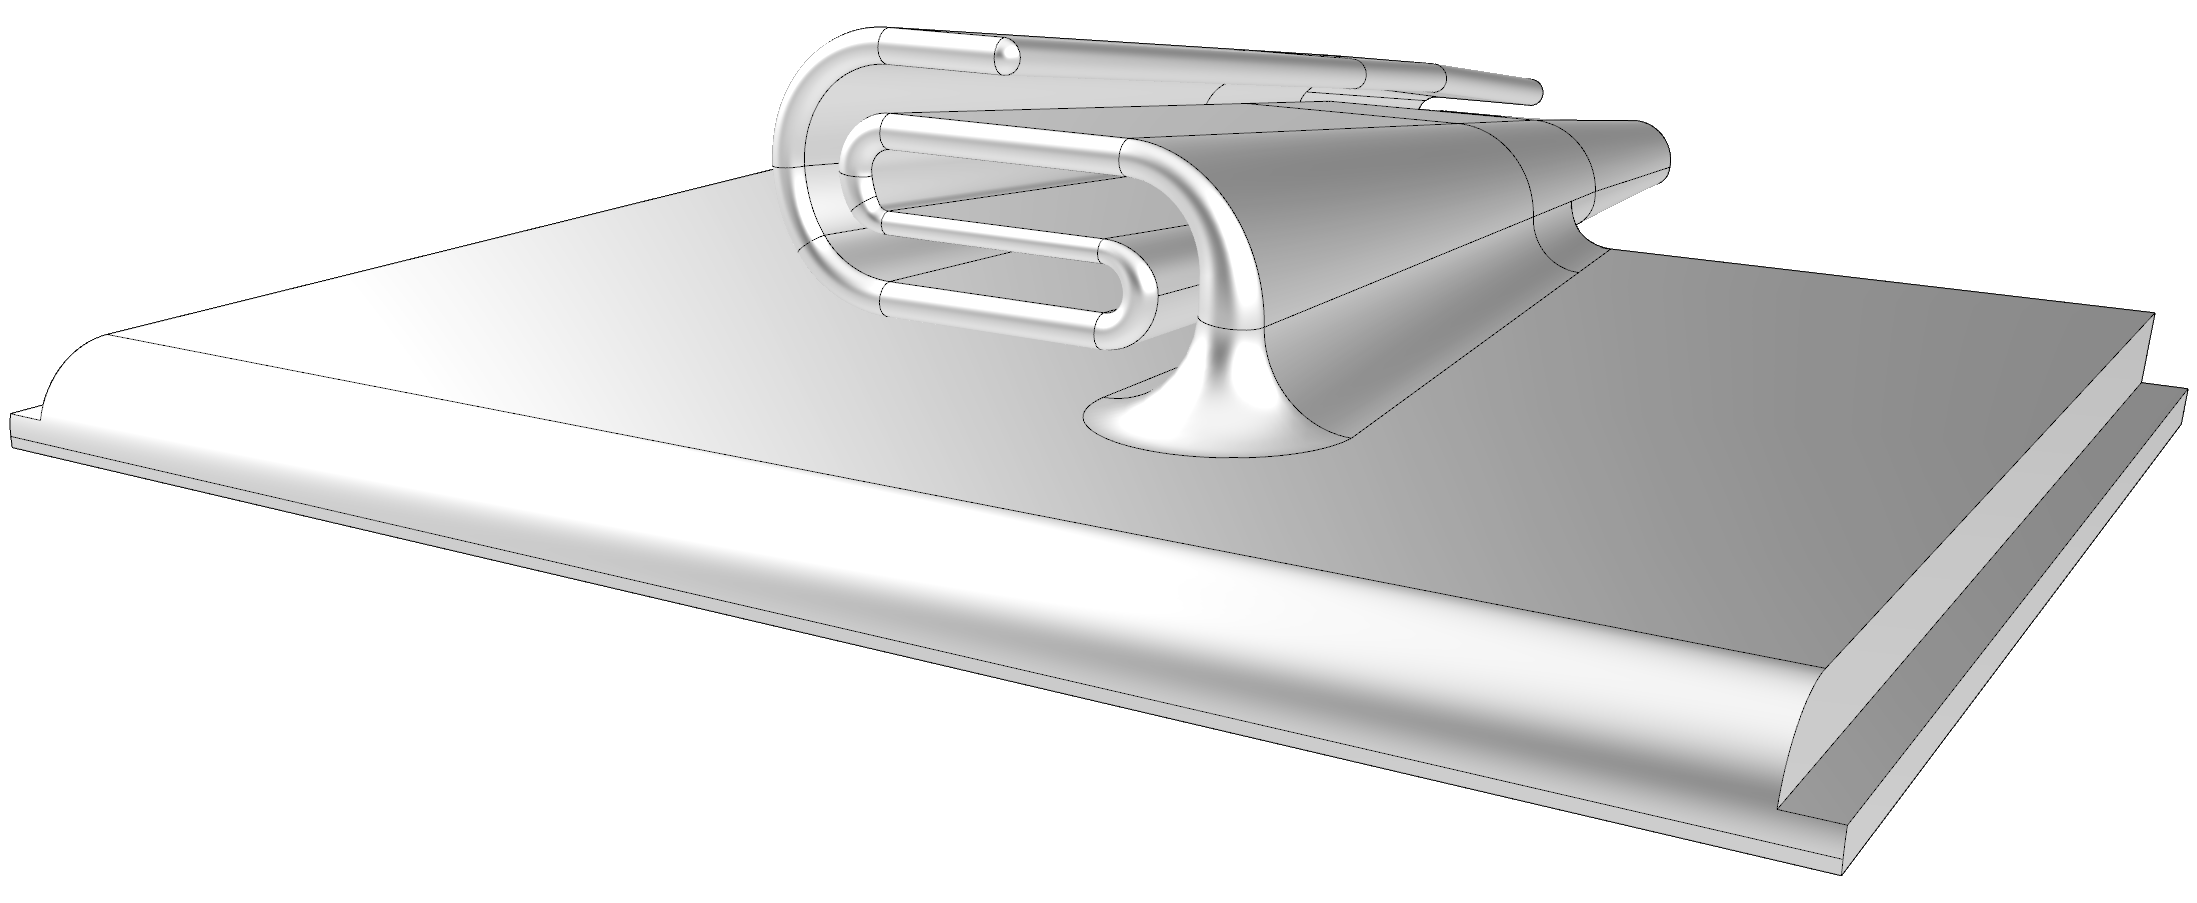
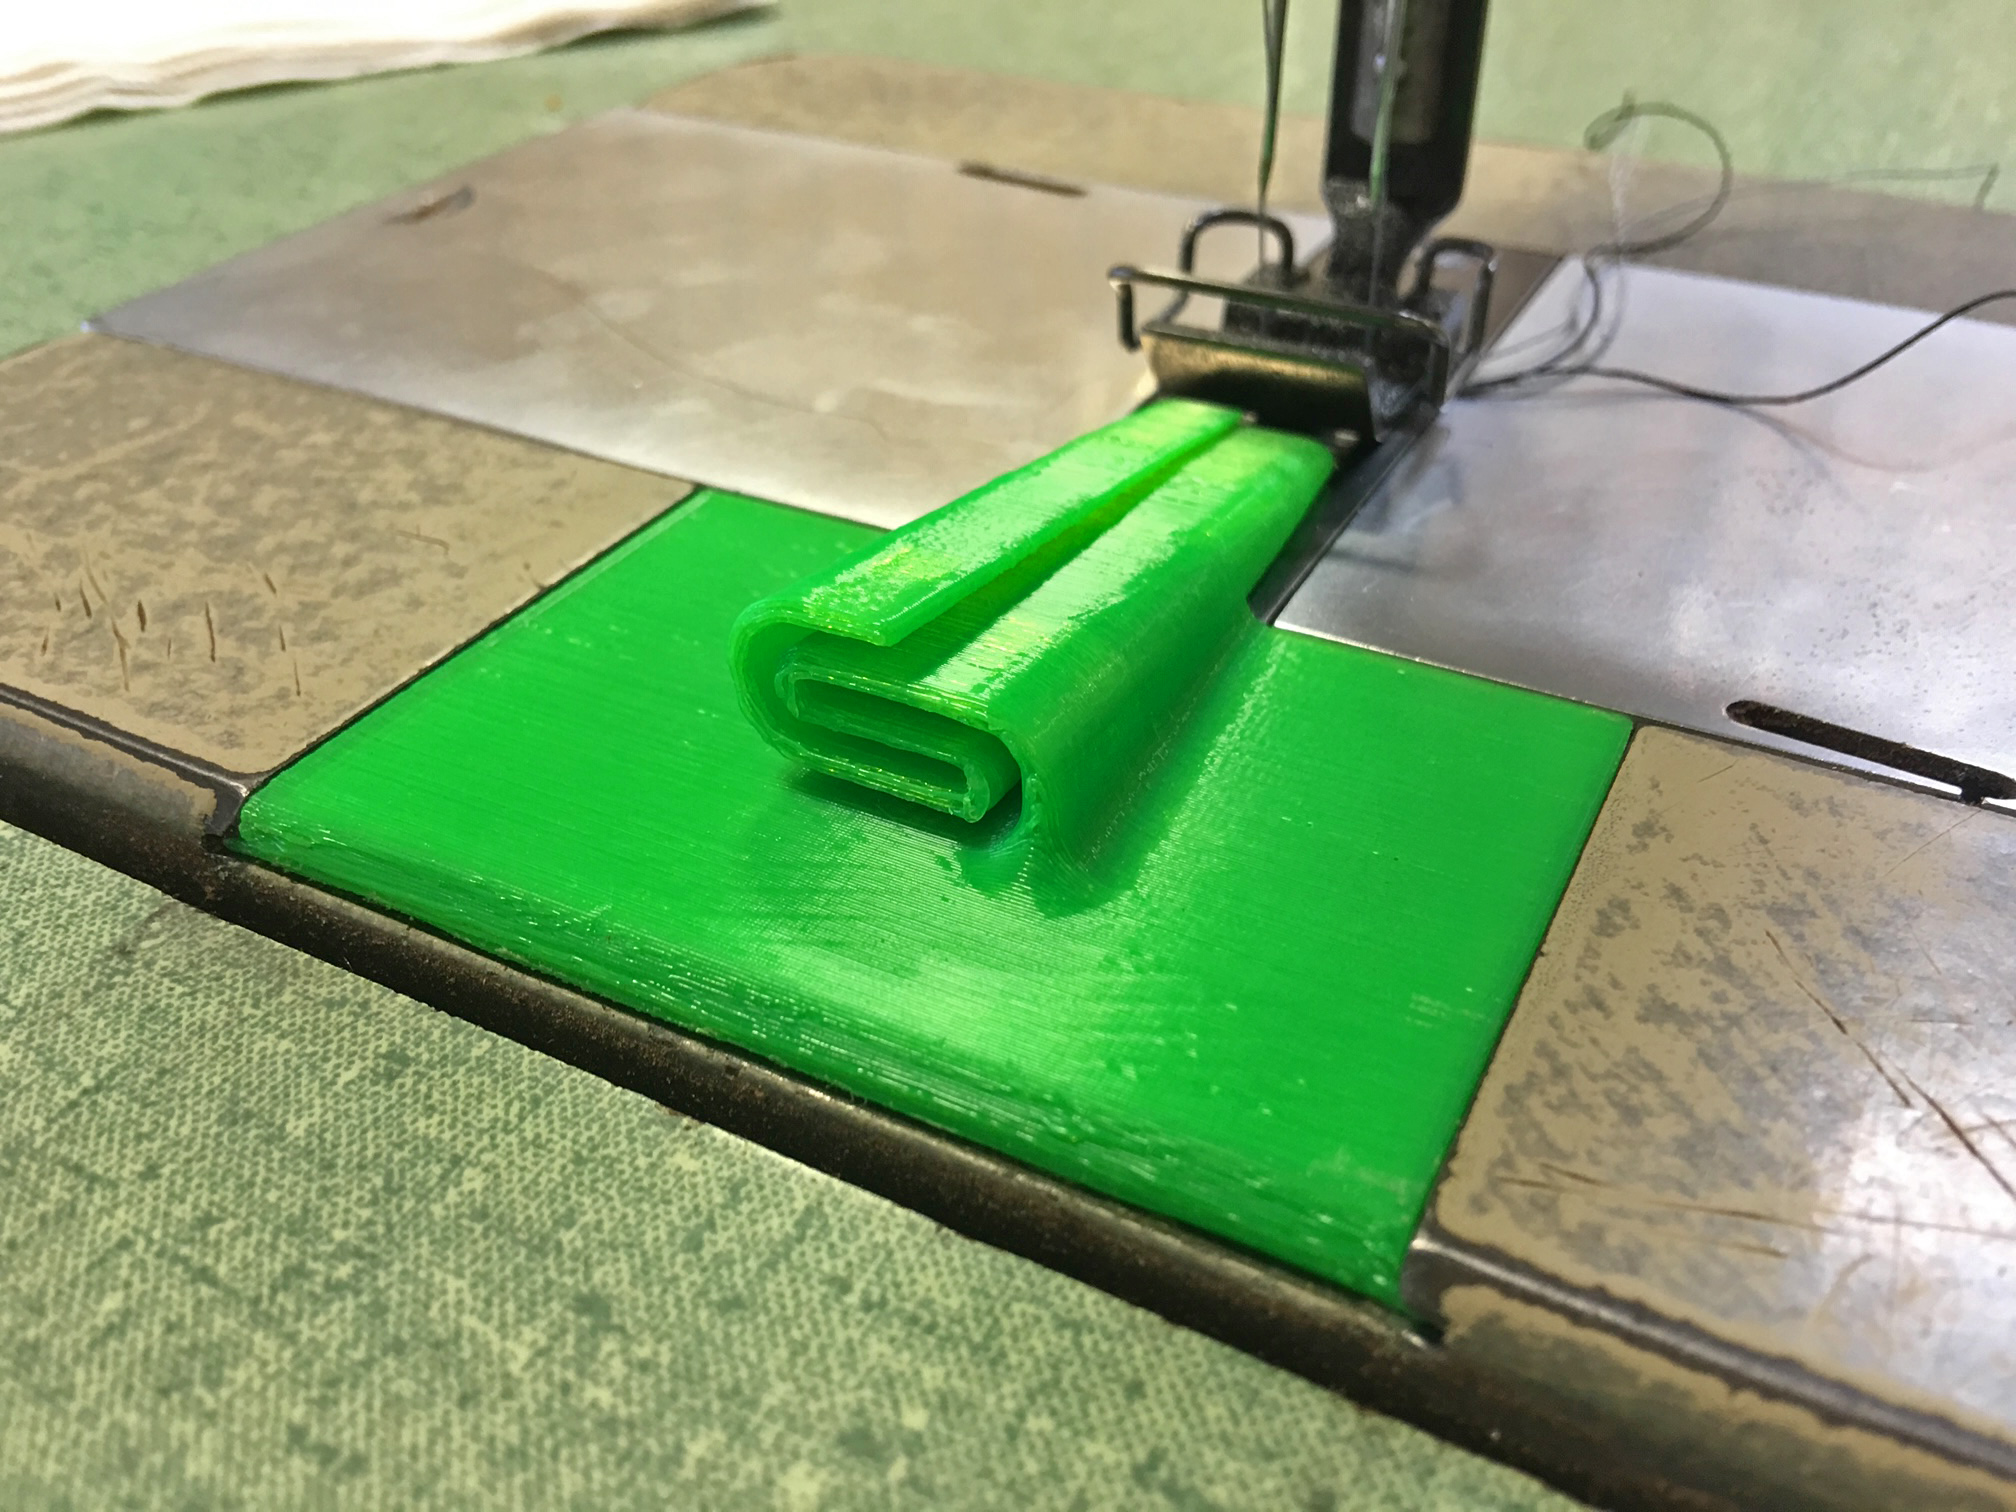
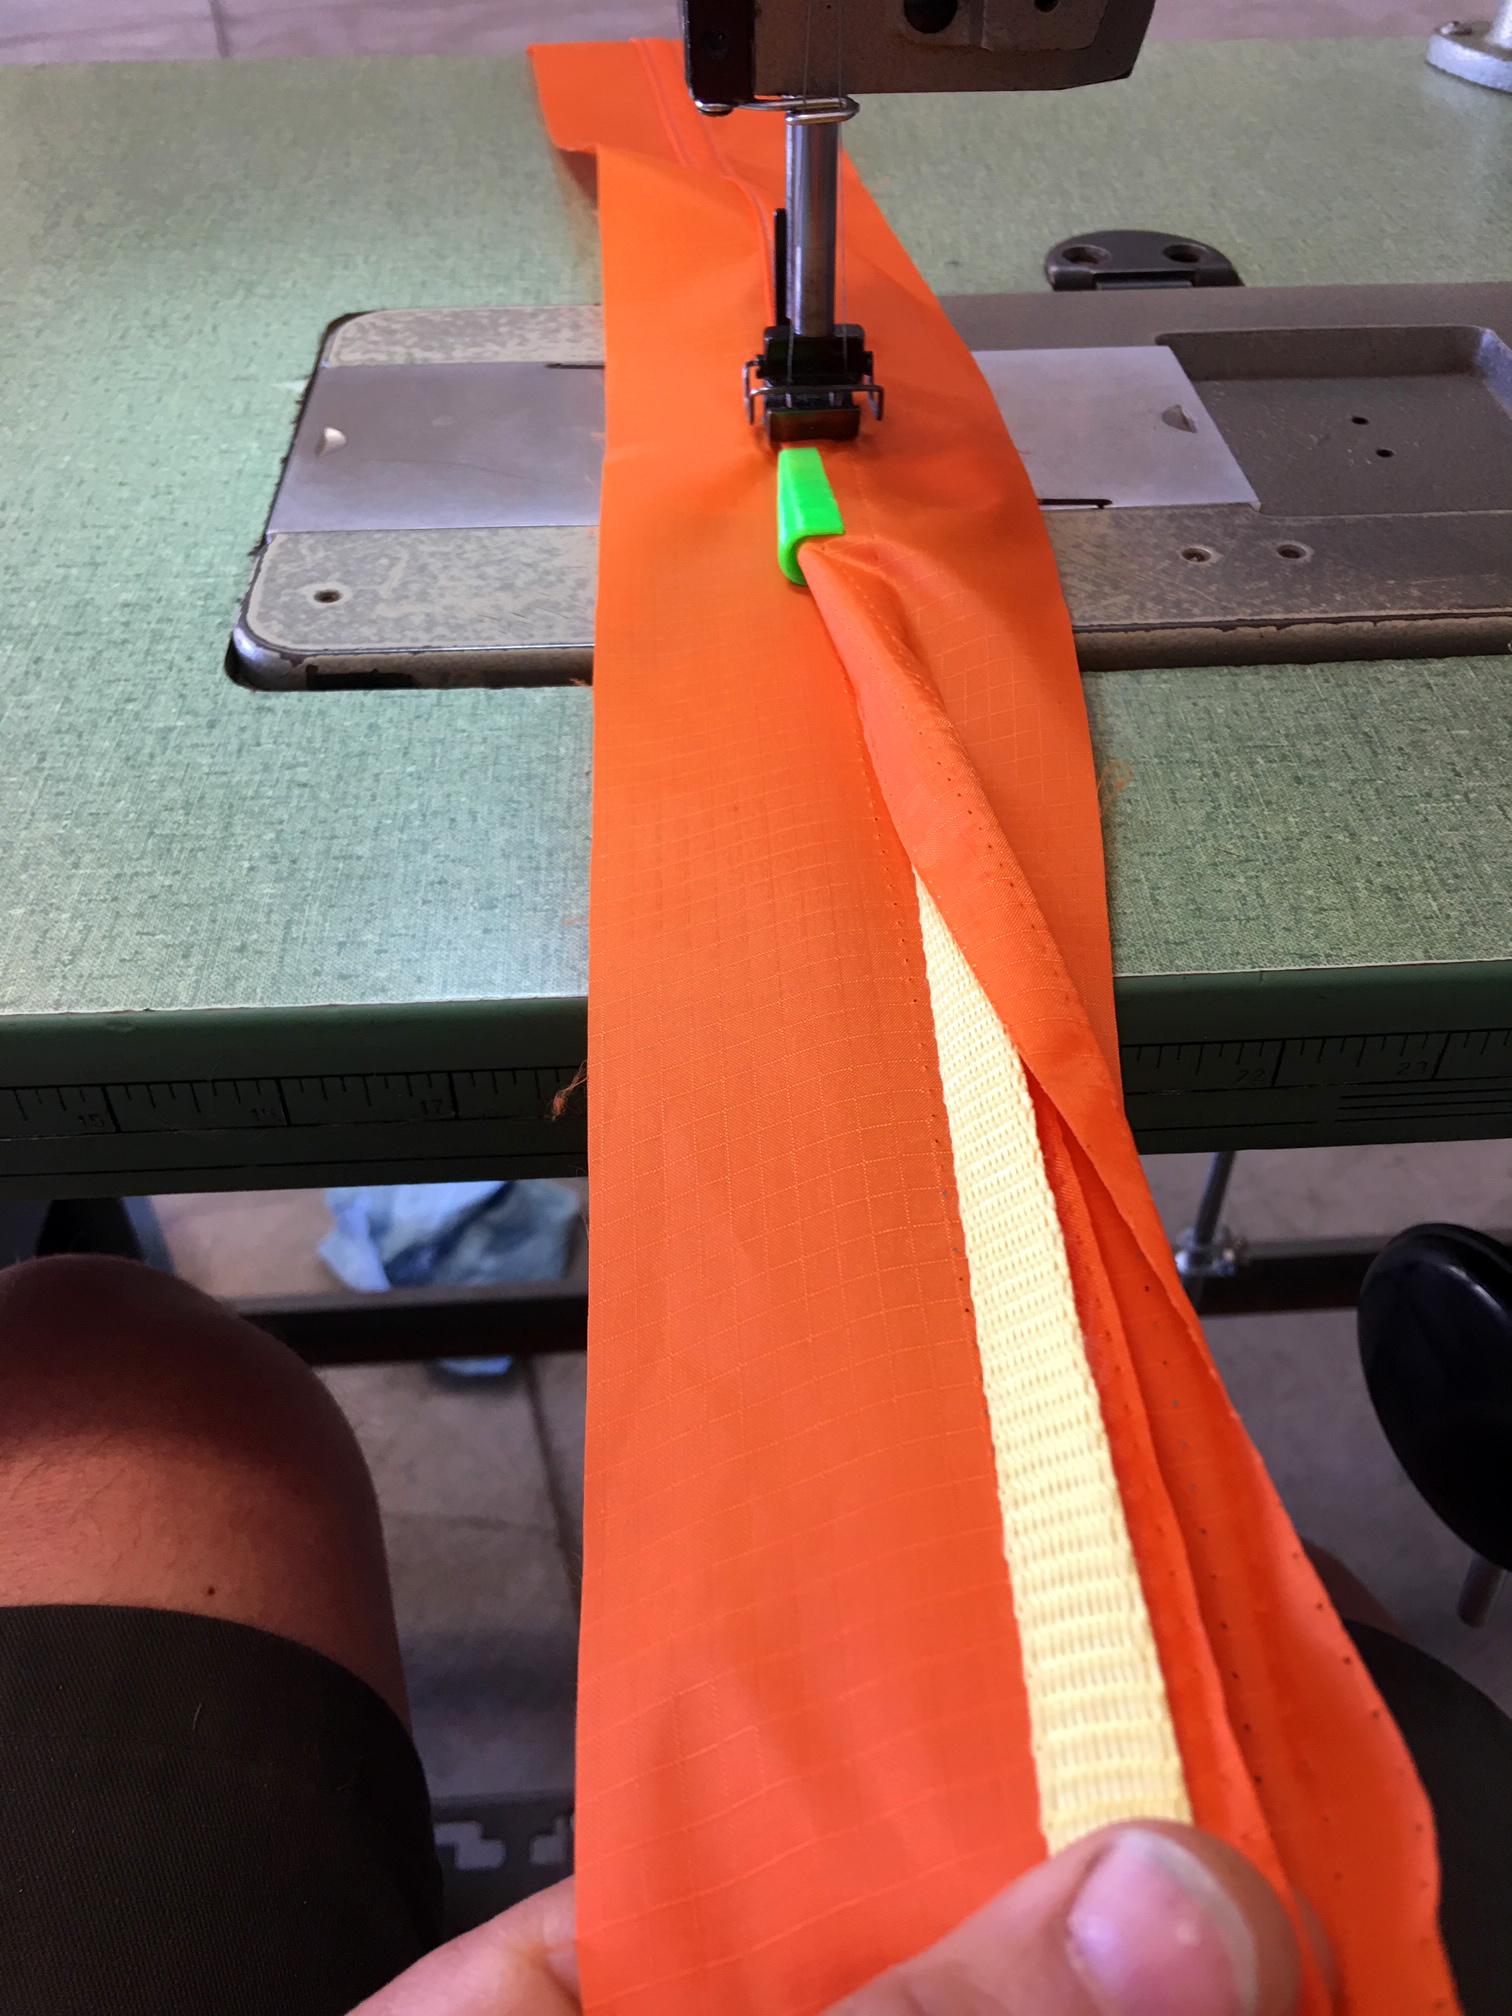
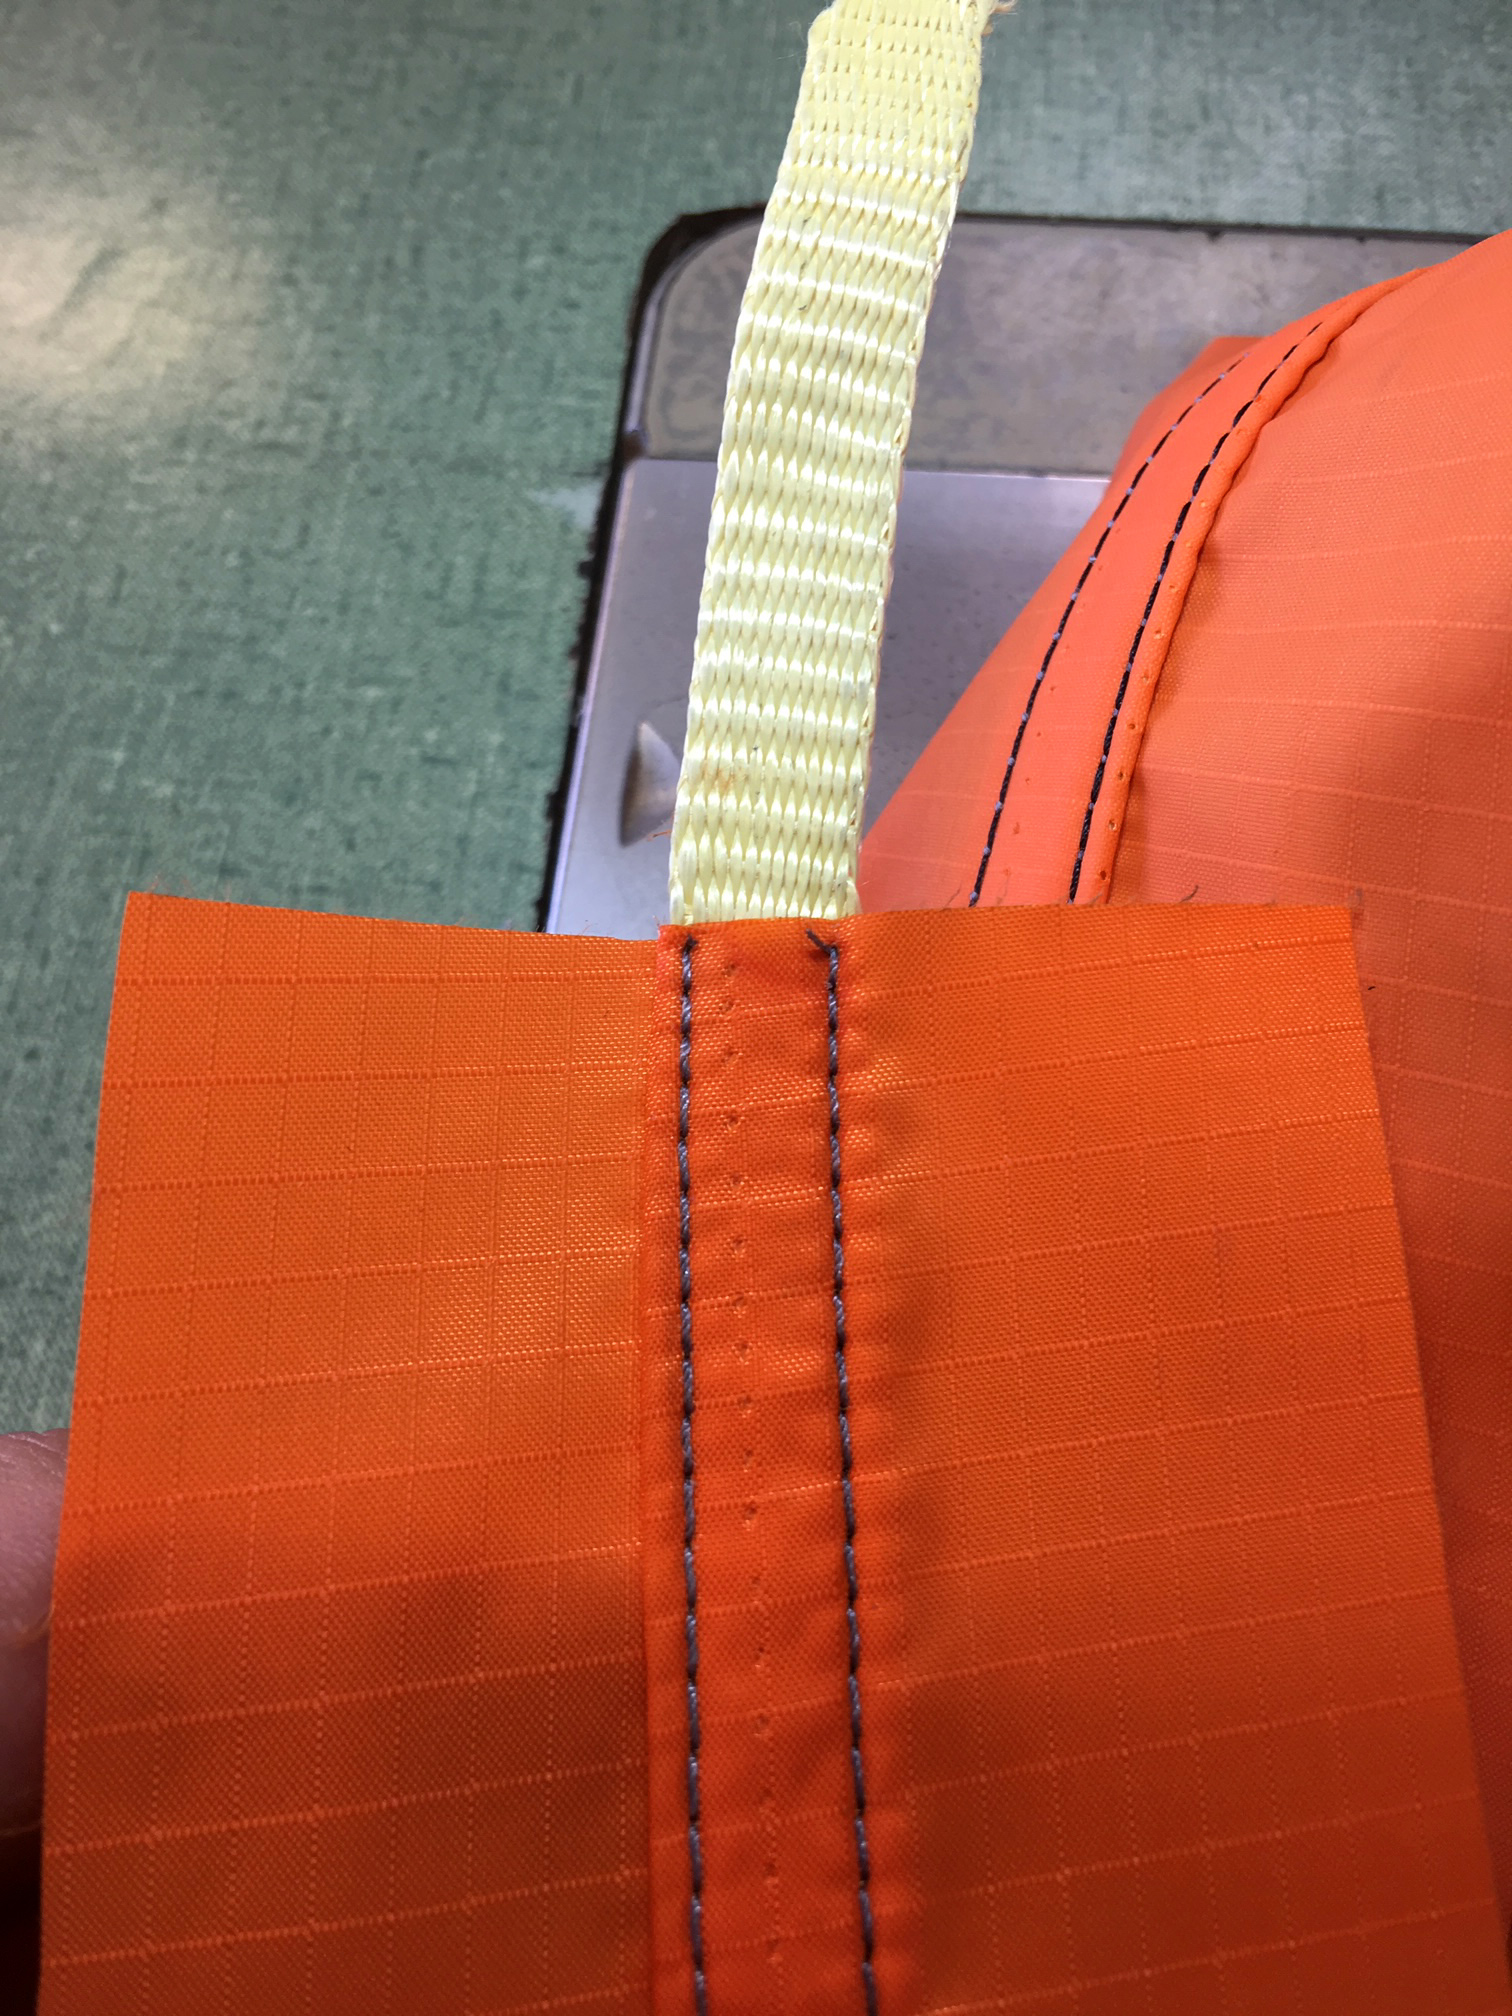
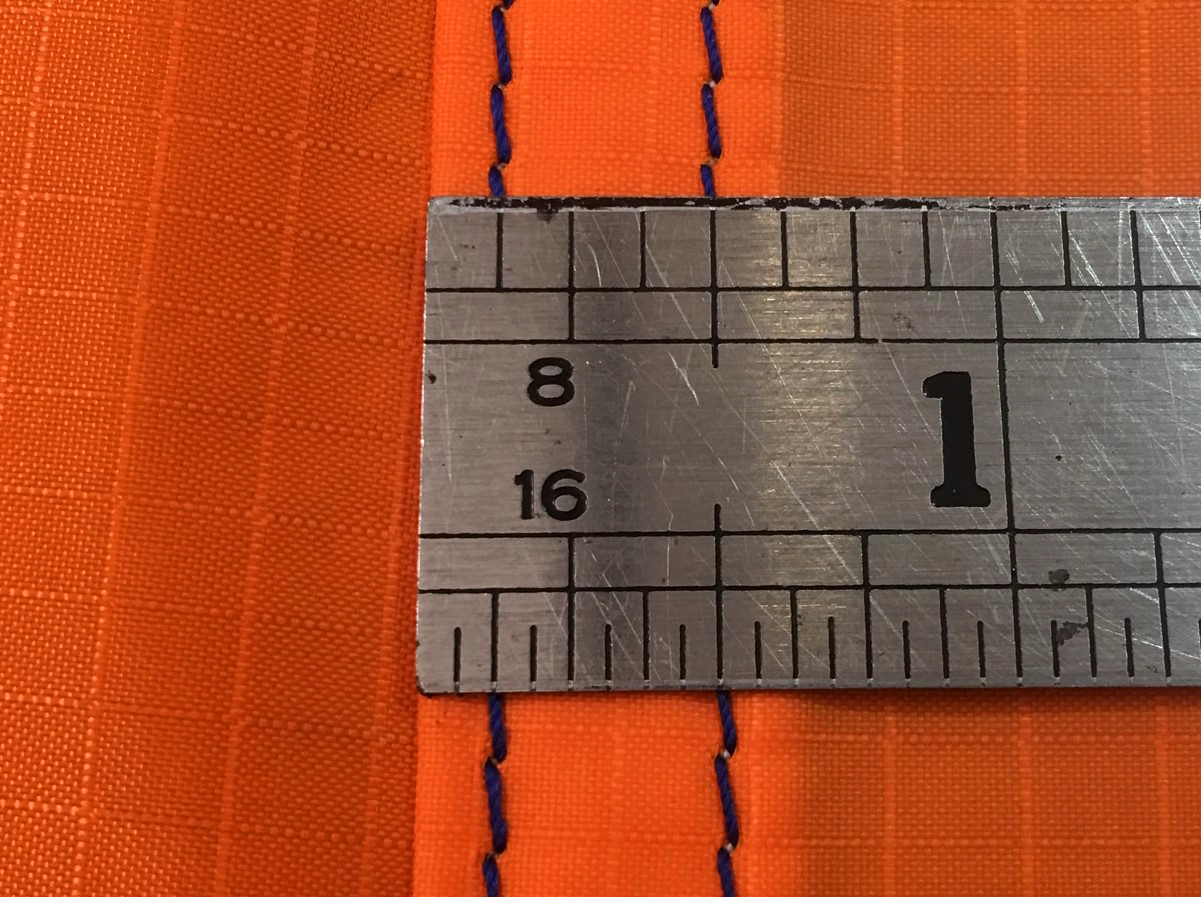
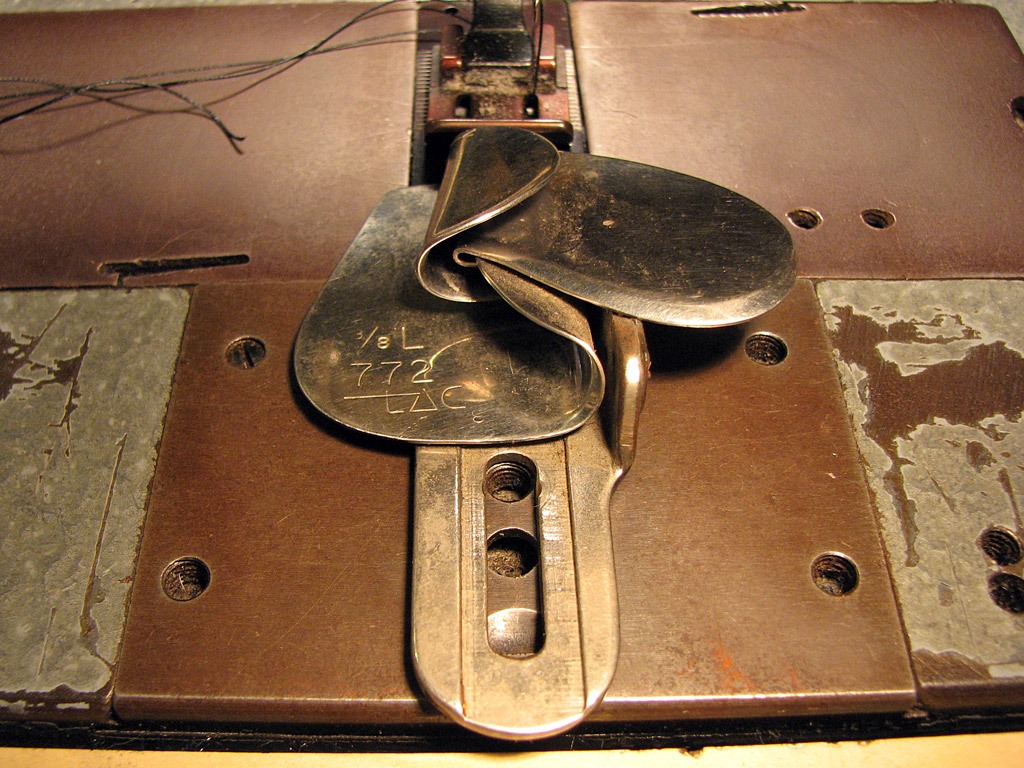
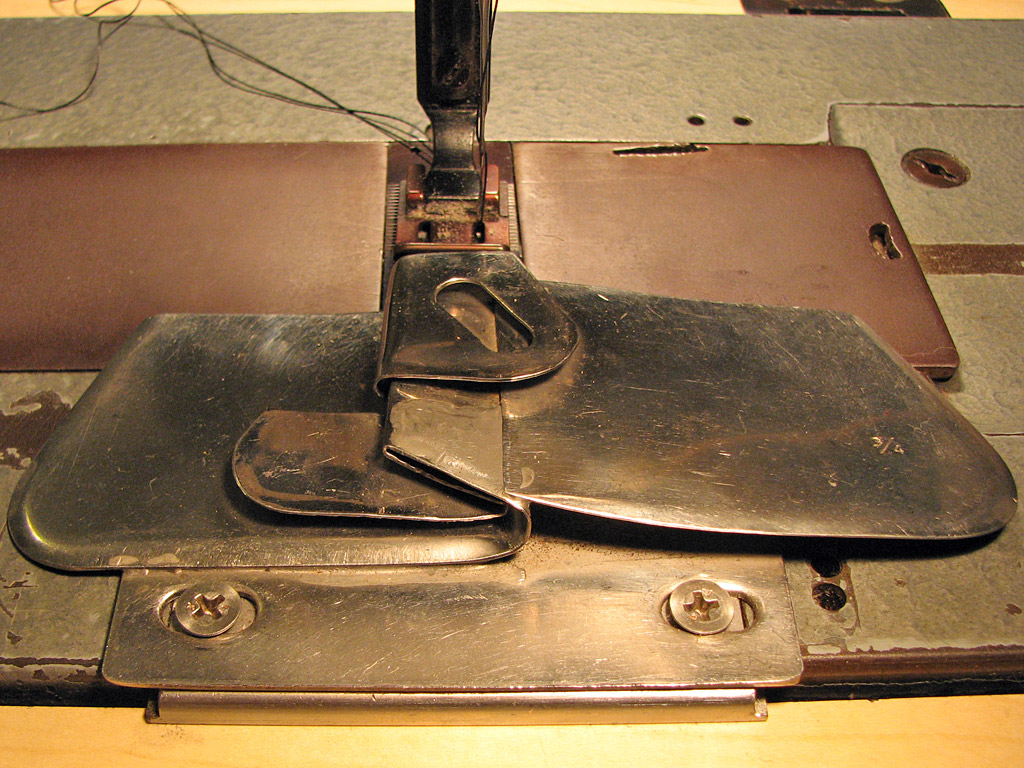
OK... Let's Use A Seam Folder!Seam folder technique (regardless of fabric used) generally consists of the following steps: 1. Insert left (lower) side of fabric into the folder, from the left, so that the far end of the piece is slightly behind (i.e. all the way through) the folder. You might need to wiggle it front to back while pushing from the left until it slips into the fold, but that's not always necessary if you use your right hand in the following manner. Your right pointer and thumb should be used to upturn the fabric in front of the folder (closer to your body) and influence the whole fold to be an even 3/4" wide. By folding the front evenly at the same time as the rear goes through the folder, you can keep the fold pretty perpendicular the whole time. 2. Once you make the foldover an even 3/4" wide along the first 6", keep both hands where they are and slide it into position under the raised presser foot (move your upper body to do that without messing things up). If you don't have a knee (or foot) lifter for the presser foot... Good luck. Drop the presser foot to lock it in place. The best place to position the fabric under the foot is so that the rear edge is just behind the rear of the foot. Use the whole foot to keep it down for now. 3. With the presser foot down, don't let go with your right hand just yet - BEND the folded fabric over and down the table's edge. This "locks" the 3/4" fold width in place at the front end of the piece, and the presser foot locks the fold at the rear end. This keeps the left side from migrating while positioning the right side. Some folks use magnets to lock each side in place, but they would just get in my way. They probably help while learning, though. 4. Now, for the right side. Repeat step 1, except reversed. Use your left pointer and thumb to roll the front fold while you push/slide the fabric into the folder with your right hand. 5. Tricky part: With the presser foot raised, use your left forearm to keep the left side fabric from shifting. You need to slide the right side fabric towards the back so that the left and right edges line up under the foot. When sliding, use your fingers and thumb to push the entire right side back while trying to keep the fold at its optimal 3/4" width the whole time. When the back edges are lined up, you can put the foot down again. Your folds should still be 3/4" wide for the first 6" or so. They don't need to interlock for that 6", but a properly prepared fold should interlock at least for a short bit out the front of the folder. 5A. If the fold is too narrow under the presser foot when you put the foot down, or if it is slightly tapered towards the back, or any other combination of "not quite right", you need to do some repositioning with the foot up. I can't really explain this properly, but each hand needs to control its individual side. Keep gentle pressure inwards to keep the pieces from migrating out of the fold when the foot is up, and reposition as necessary. This is the most critical point in the process where it's easiest to mess up and then have to start over. When everything goes just right up to this point, quite often it's not even necessary to reposition things - just slide the right side back, drop the foot, and continue. 6. [This step is not necessarily required if you have a machine with reverse, or if you don't mind that the first 3/4" of the fold isn't stitched.] 7. You're almost ready to sew - but first, you must get the run of the fold ready. Position the needles down through the fabric to lock the beginning of the fold so that it's positively secured in place. If the needles aren't into the fabric, it might be pulled out from underneath the presser foot while the run of the fold is being set up. There is some pulling and tension involved, and it's easy to pull the fabric out from underneath the presser foot if the needles aren't down in place. 8. With needles in place, grab the front edge of the left side with your left hand, about 12-18" in front of the needles. For a beginner, shorter spans are easier. I prefer my thumb on top, forefinger on bottom. Do not hold it with a fold yet. Clasp the edge tightly in between your fingers. 8A. With the left side held straight, wrap the right side around the tight left edge and 3/4" wide. Hold the wrapped right side with your right hand, then fold that over to the left side. Grab the completed fold again with your left hand and keep it in place - it will remain there for sewing. When folding (and more importantly, sewing), your other three fingers (middle, ring, pinky) should be used to great effect to pull the fabric on each side of the fold tight so that there is no slack that can cause grief. 9. Your right hand should then be behind the presser foot, gripping all four threads firmly so they don't get sucked back under and tangled in the hook/bobbin. Some machines are notorious for doing that to loose thread ends, so it's a good habit to get used to which only takes a second. It's a good habit to get used to sewing with your right arm through the machine head. You have the benefit of automatically clearing the fabric through the arm as the pile gets higher. 10. With the fold held tight in your left hand and your right hand pulling on the threads, you are finally ready to start sewing! Go for it! Use your forearms and other three fingers on each hand (against each palm) to keep the fabric on both sides of the fold wrinkle-free and tight. Your rear hand and front hand should be pulling equally away from each other so there is constant tension on the fold (often a moderate amount is necessary), but allow the action of the feed dog and stitching to actually advance the fabric. Move your upper body as necessary to allow the fabric to be advanced through the machine, and keep your hands and arms as still as possible. The opposing hand tension does two things - it minimizes the inevitable shrinkage from stitching, and it ensures the fold doesn't come undone. Long runs can be done, but more tension is necessary to maintain a longer fold.
Watch the video and take notes on the sewing technique. Pay special attention to my hand and arm placement, and try to see what I do with my three minor fingers and forearms to keep things taut. I'm holding the closest three inches aside of the fold with each hand, which does (at least) three beneficial things: A. Helps keep the fold width consistent
Hand-Folding Your SeamsFolding WITHOUT a seam folder starts off with a different set of instructions, but the latter portion and subsequently sewing it is all one and the same. Making consistent folds without a folder: 1. Start with the left piece flat on the machine to the left of the presser foot. 2. Place the right piece directly on top of the left piece, but upside down. Offset the top piece 3/4" to the left of the bottom piece's right edge. 3. Place your left pointer finger and thumb even with the edge of the top piece, about 4" apart from each other. Position your fingers close to the beginning of the piece (furthest away from you). 4. Use your right pointer and thumb to fold the bottom piece up and over the edge, while making sure you keep some tension with your left fingers. This ensures the edge stays well-defined and allows the fold to be made around it without influencing its position. 5. After the first fold is made, position your right pointer and thumb just inside your left fingers to now hold the newly-created fold's edge in the same manner as Step 3. Your middle finger will probably get involved. 6. With tension held by your right two fingers, use your left pointer and thumb to fold the top piece up and over the taut edge in the same fashion. Use your left fingers to hold everything in place, and your right hand can come out. Flatten the fold. You should have a perfectly-formed 3/4" wide fold for the first 4-6". If not, practice more. 7. Once the fold is made, grab the end of the fold with one hand, and grab the front end of the proper fold with your other. Reposition the assembly under the presser foot and enter into the folding and sewing instructions above (Step 7). I find that things migrate minimally if I grab each end of the fold with my hands, but keep the fabric flat against the throat of the machine as much as possible. Lifting it off the throat when moving it sometimes causes unnecessary migration, which should be avoided entirely. It should wind up under the presser foot exactly the way it was folded - perfectly. If not, something happened - start over!
Clutch Problems?
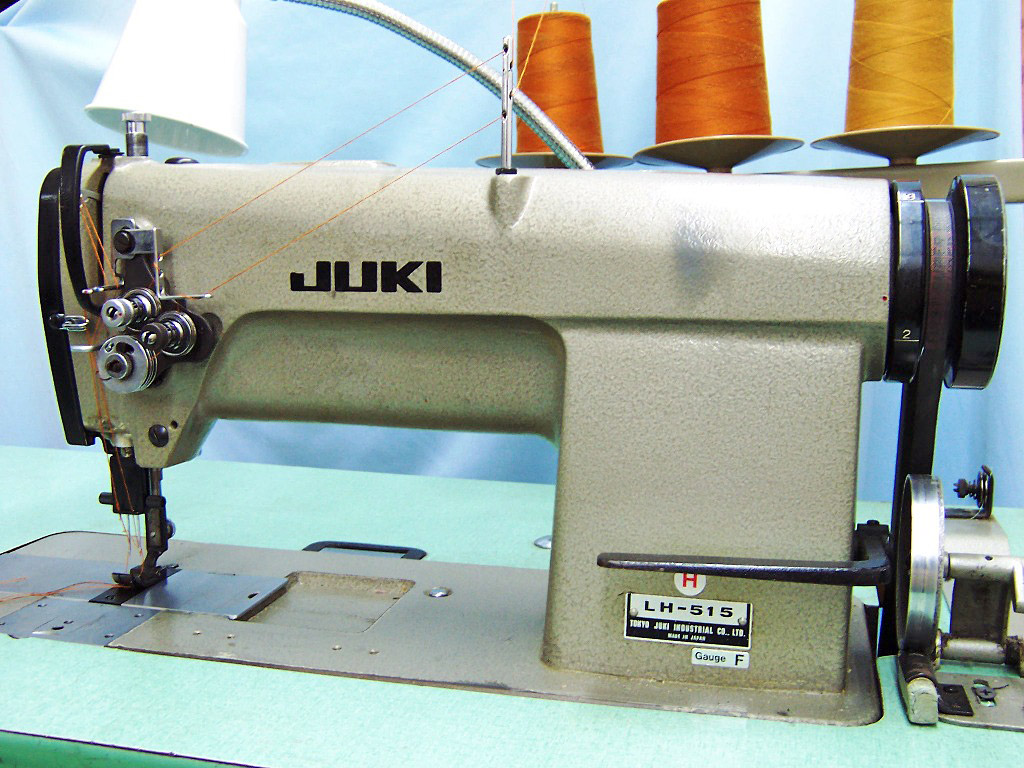
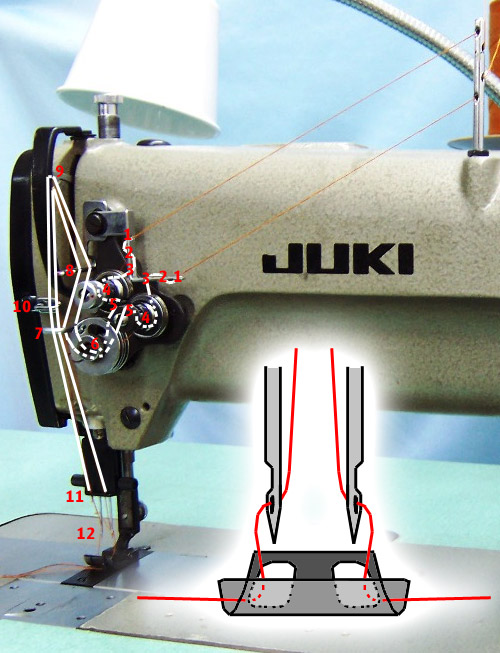
Industrial sewing machines' clutch motors are designed for on-off operation. When you get used to sewing fast, you will rarely sew at less than full speed. Check out that video for how it's done. However, if you ever need to sew slowly, i.e. for detail work, or at the very beginning of starting out a seam, you can slip the clutch carefully by pushing down very gently at the point of contact, which allows the clutch to barely touch the motor plate. Sometime's it's a fine art. Motorcycle riders call this "feathering" the clutch. Another technique is to tap the foot pedal quickly but lightly to engage and disengage the clutch in order to sew slower than the motor is spinning. Recently (it's 2013 now as of this edit), servo motors have become more widespread in industrial sewing use. Those folks who have trouble learning to sew with a fast clutch motor will certainly have better results using a servo motor. The maximum motor speed can be easily and instantly set by an adjustable hand knob, and the foot pedal will also throttle the motor from zero to the set motor speed, smoothly and proportionally, depending on how far the foot pedal is depressed during operation. Servo motors are a great option to be able to switch speeds instantly. One can go from wide-open-throttle, straight-line-full-speed-ahead for sewing gores together, to very slow speeds for detail sewing of accessories and other small items - all at the twist of a knob. My next machine will have a servo motor. Some even newer sewing machines are direct drive, where the motor is an integral part of the machine head. Some advantages to a direct drive machine include integrated needle positioning, zero friction losses due to belt slippage (no rubber belts are used), and more direct torque to punch through extra heavy layers of material. Needle positioning offers the user the option of automatically stopping the needles in either the "up" or "down" position each time the machine comes to a stop. For a person sewing long balloon seams, the needles should be stopped in the "down" position. This alleviates the need for the user to manually spin the hand wheel so that the needles are down in the fabric. Fabric tension should then be applied while the needles are down in the fabric, so the material will not slip under the presser foot. Once the fabric is tensioned properly, the next long stretch of sewing can be accomplished.
|
Type Certificated |
|||||||||||||||||||||||||||||||||||||||||||||||||||||||||||||||||||||||||||||||||||||||||||||||||||||||||||||||||||||||||||||||||||||||||||||||||||||||||||||||||||||||||||||||||||||||||||||||||||||||||||||||||||||||||||||||||||||||||||||||||||||||||||||||||||||||||||||||||||||||||||||||||||||||||||||||||||||||||||||||||||||||||||||||||||||||||||||||||||||||||||||||||||||||||||||||||||||||||||||||||||||||||||||||||||||||||||||||||||||||||||||||||||||||||||||||||||||||||||||||||||||||||||||||||||
| Please email with any corrections or updates |
|||||||||||||||||||||||||||||||||||||||||||||||||||||||||||||||||||||||||||||||||||||||||||||||||||||||||||||||||||||||||||||||||||||||||||||||||||||||||||||||||||||||||||||||||||||||||||||||||||||||||||||||||||||||||||||||||||||||||||||||||||||||||||||||||||||||||||||||||||||||||||||||||||||||||||||||||||||||||||||||||||||||||||||||||||||||||||||||||||||||||||||||||||||||||||||||||||||||||||||||||||||||||||||||||||||||||||||||||||||||||||||||||||||||||||||||||||||||||||||||||||||||||||||||||||
|
|||||||||||||||||||||||||||||||||||||||||||||||||||||||||||||||||||||||||||||||||||||||||||||||||||||||||||||||||||||||||||||||||||||||||||||||||||||||||||||||||||||||||||||||||||||||||||||||||||||||||||||||||||||||||||||||||||||||||||||||||||||||||||||||||||||||||||||||||||||||||||||||||||||||||||||||||||||||||||||||||||||||||||||||||||||||||||||||||||||||||||||||||||||||||||||||||||||||||||||||||||||||||||||||||||||||||||||||||||||||||||||||||||||||||||||||||||||||||||||||||||||||||||||||||||
Aerostar
|
|||||||||||||||||||||||||||||||||||||||||||||||||||||||||||||||||||||||||||||||||||||||||||||||||||||||||||||||||||||||||||||||||||||||||||||||||||||||||||||||||||||||||||||||||||||||||||||||||||||||||||||||||||||||||||||||||||||||||||||||||||||||||||||||||||||||||||||||||||||||||||||||||||||||||||||||||||||||||||||||||||||||||||||||||||||||||||||||||||||||||||||||||||||||||||||||||||||||||||||||||||||||||||||||||||||||||||||||||||||||||||||||||||||||||||||||||||||||||||||||||||||||||||||||||||
Cameron
|
|||||||||||||||||||||||||||||||||||||||||||||||||||||||||||||||||||||||||||||||||||||||||||||||||||||||||||||||||||||||||||||||||||||||||||||||||||||||||||||||||||||||||||||||||||||||||||||||||||||||||||||||||||||||||||||||||||||||||||||||||||||||||||||||||||||||||||||||||||||||||||||||||||||||||||||||||||||||||||||||||||||||||||||||||||||||||||||||||||||||||||||||||||||||||||||||||||||||||||||||||||||||||||||||||||||||||||||||||||||||||||||||||||||||||||||||||||||||||||||||||||||||||||||||||||
FireFly
|
|||||||||||||||||||||||||||||||||||||||||||||||||||||||||||||||||||||||||||||||||||||||||||||||||||||||||||||||||||||||||||||||||||||||||||||||||||||||||||||||||||||||||||||||||||||||||||||||||||||||||||||||||||||||||||||||||||||||||||||||||||||||||||||||||||||||||||||||||||||||||||||||||||||||||||||||||||||||||||||||||||||||||||||||||||||||||||||||||||||||||||||||||||||||||||||||||||||||||||||||||||||||||||||||||||||||||||||||||||||||||||||||||||||||||||||||||||||||||||||||||||||||||||||||||||
Kubicek Factory / Kubicek Balloons / Balóny Kubíček spol. s r.o.
Kubicek
|
|||||||||||||||||||||||||||||||||||||||||||||||||||||||||||||||||||||||||||||||||||||||||||||||||||||||||||||||||||||||||||||||||||||||||||||||||||||||||||||||||||||||||||||||||||||||||||||||||||||||||||||||||||||||||||||||||||||||||||||||||||||||||||||||||||||||||||||||||||||||||||||||||||||||||||||||||||||||||||||||||||||||||||||||||||||||||||||||||||||||||||||||||||||||||||||||||||||||||||||||||||||||||||||||||||||||||||||||||||||||||||||||||||||||||||||||||||||||||||||||||||||||||||||||||||
Lift Factors of FAA Type Certificated Hot Air Balloon Envelope Makes/Models |
|||||||||||||||||||||||||||||||||||||||||||||||||||||||||||||||||||||||||||||||||||||||||||||||||||||||||||||||||||||||||||||||||||||||||||||||||||||||||||||||||||||||||||||||||||||||||||||||||||||||||||||||||||||||||||||||||||||||||||||||||||||||||||||||||||||||||||||||||||||||||||||||||||||||||||||||||||||||||||||||||||||||||||||||||||||||||||||||||||||||||||||||||||||||||||||||||||||||||||||||||||||||||||||||||||||||||||||||||||||||||||||||||||||||||||||||||||||||||||||||||||||||||||||||||||||||||||||||||||||||||||||||||||||||||||||||||||||||||||||||||||||||||||||||||||||||||||||||||||||||||||||||||||||||||||||||||||||||||||||||||||||||||||||||||||||||||||||||||||||||||||||||||||||||||||||||||||||||||||||||||||||||||||||||||||||||||||||||||||||||||||||||||||||||||||||||||||||||||||||||||||||||||||||||||||||||||||||||||||||||||||||||||||||||||||||||||||||||||||||||||||||||||||||||||||||||||||||||||||||||||||||||||||||||||||||||||||||||||||||||||||||||||||||||||||||||||||||||||||||||
All values are listed in Pounds per 1000 cubic feet
|
|||||||||||||||||||||||||||||||||||||||||||||||||||||||||||||||||||||||||||||||||||||||||||||||||||||||||||||||||||||||||||||||||||||||||||||||||||||||||||||||||||||||||||||||||||||||||||||||||||||||||||||||||||||||||||||||||||||||||||||||||||||||||||||||||||||||||||||||||||||||||||||||||||||||||||||||||||||||||||||||||||||||||||||||||||||||||||||||||||||||||||||||||||||||||||||||||||||||||||||||||||||||||||||||||||||||||||||||||||||||||||||||||||||||||||||||||||||||||||||||||||||||||||||||||||||||||||||||||||||||||||||||||||||||||||||||||||||||||||||||||||||||||||||||||||||||||||||||||||||||||||||||||||||||||||||||||||||||||||||||||||||||||||||||||||||||||||||||||||||||||||||||||||||||||||||||||||||||||||||||||||||||||||||||||||||||||||||||||||||||||||||||||||||||||||||||||||||||||||||||||||||||||||||||||||||||||||||||||||||||||||||||||||||||||||||||||||||||||||||||||||||||||||||||||||||||||||||||||||||||||||||||||||||||||||||||||||||||||||||||||||||||||||||||||||||||||||||||||||||||
All content and images copyright ©2000- Jon Radowski unless otherwise noted. All rights reserved.